Celebrating Color and Creative Fashion in Oslo with Flesh And Murby Studio

On a freezing winter’s day in Norway - a nation renowned for its minimalism, a small group of color enthusiasts and maximalists gathered together to worship the gods of color (and create content).

I teamed up with designers Marie and Malin from @flesh.official and @murbystudio, makeup artist Frida Pettersen, and models Elise Moen and Paal Sande at Sputnik Studio Oslo. Marie and Malin brought their out-of-this-world designs, Frida worked her magic with makeup, and Elise and Paal modeled their butts off.

Like many shoots, the day took on a life of its own. A retro vibe emerged, and we went with it, channeling the 70s, 80s, and even throwing in a touch of the 90s (because why not?). All in all, it was a funky, fun, and fabulous photoshoot that left us all feeling like we had traveled back in time to a much more colorful era.

Thoughtful Holiday Gift Guide

As my photography business matures, it’s become apparent that, when seeking clients, sustainability and ethical businesses are top of mind. I want to use my creative skills for good: to tell the stories of businesses that care about the planet and its people. Basically, those who make dope stuff while being kind.

Committed to quality, craftsmanship, and ethical business practices, here is a selection of US clients that I not only respect as businesses but also think make rad gifts.

Tabio, Billie Todd, Geyed, Florin Arte, + Saint Beasley.

Tabio - Cozy meets Fashion.

Family owned, Tabio socks are crafted with meticulous attention to detail, offering the perfect blend of comfort and fashion. (I wear mine everyday they are clean).

tabiousa.com

Florin Arte

Florin Arte is a female and veteran owned business that is dedicated to sourcing and manufacturing the highest quality products in the US.

florinarte.com

Saint Beasley

Art and Homegoods for Creatice Living

Transform living spaces into a haven of creativity with Saint Beasley's collection of art and home goods. From unique art prints to stylish decor items, each piece is a testament to creativity and joy.

saintbeasley.com

Billie Todd

Timeless Craftsmanship

Wrap your loved ones in the warmth of Billie Todd's sweaters, a testament to quality craftsmanship and timeless style.

billietodd.com

Geyed

Chakra Balancing and Comfortable

Ideal for yoga enthusiasts and those who appreciate activewear that cares for both the wearer and the environment. Gift a piece that effortlessly combines fashion with functionality.. These are way more comfortable than Lulu (promise).

geyed.com

Hello, Is it Light You're Looking For? A Guide to Lighting in Professional Fashion Photography

Lighting is an essential element in fashion photography (did you know “photography” means “writing with light”?). Lighting is at the heart of every great photograph, shaping not only the image's visibility but also its mood and storytelling power. In the world of fashion photography, mastering the art of lighting is essential. This blog post explores the fundamental distinctions between hard and soft lighting, high-key and low-key techniques, and the use of available light versus studio strobes or continuous lighting. Whether you're looking to craft a moody narrative or create a vibrant and upbeat fashion story, understanding these lighting choices can transform your photography and elevate your visual storytelling. Light has the power to shape the mood and tone of an image. Understanding the different types of lighting will help create the desired effect for their fashion shoots.

HARD V. SOFT

Perhaps the most important decision you’ll make when shooting is if you want hard or soft light. They create exceptionally different moods. Check out the examples here: both images were shot in the same studio and the models are in similar poses. But they have a very different feel. This is due to the lighting choices our team made. The image in the lingerie was shot intentionally with soft light to give a romantic feel to the image, whereas for the model in the dress, we wanted it to feel editorial so we chose a hard lighting setup.

Soft Light:

Soft light is diffused and creates a gentle, flattering effect on the subject. It is achieved by using a large light source such as a softbox, umbrella or diffuser, which scatters the light, minimizing shadows and producing a soft, even glow. Soft light is often used for portrait or beauty shots, as it flatters the subject's features and smooths out imperfections. It can also create a romantic or dreamy mood, perfect for fashion shoots that require a softer aesthetic.

Hard Light:

Hard light is characterized by strong, direct light that creates distinct shadows and harsh contrasts. It is often used to create a dramatic, edgy mood in fashion photography, emphasizing the model's features and adding depth and texture to the image. Hard light is often created by using a smaller light source such as a beauty dish or a bare bulb, which produces a concentrated beam of light. It is commonly used in outdoor shoots or to create a high-contrast look for fashion editorials.

Hard light shot in studio.

Soft light shot in studio.

High key mens fashion shot in studio

Low key mens fashion shot in studio

HIGH KEY V. LOW KEY

High-key and low-key lighting are contrasting studio techniques that significantly impact the mood and aesthetics of your visuals. The choice between these lighting styles allows photographers to convey varying emotions and aesthetics, shaping the visual narrative of their fashion compositions.

High Key

High-key lighting involves flooding the scene with soft, even illumination, resulting in a bright and low-contrast aesthetic that captures a clean, youthful, and upbeat mood, often seen in commercial or beauty shoots. High-key lighting minimizes contrast, resulting in well-lit subjects with soft shadows, suitable for conveying positivity and openness. For high-key lighting, use large soft light sources positioned at an angle to create soft shadows and maintain dimension.

Low Key

Low-key lighting relies on dramatic shadows create a moody and mysterious atmosphere, accentuating textures, contours, and depth, frequently employed in edgier fashion editorials or portraits. Low-key lighting emphasizing shadows and minimal whites and midtones, making it ideal for dramatic and narrative content.

AVAILABLE V STROBES/CONTINUOUS

The choice between available light and studio strobes in photography can significantly influence the final outcome of your images. Available light, often natural sunlight or ambient lighting, can provide a unique, organic quality to your photos, creating a sense of authenticity and atmosphere. It's particularly well-suited for candid or environmental portraits, capturing genuine moments. On the other hand, studio strobes offer precise control over lighting conditions. They allow photographers to shape and manipulate light, achieving consistent and controlled results in any environment. Studio strobes are ideal for commercial and studio-based photography, where precision, repeatability, and creative control are paramount. The decision between the two depends on the desired mood, style, and context of your photography, with each approach offering its own set of advantages and artistic possibilities.

Available Light (also known as Natural Light):

Available light refers to the use of sunlight, either indoors or outdoors, to illuminate the subject. It is a popular choice for fashion photography, as it can create a range of moods depending on the time of day, the weather and the location. Natural light can be soft and diffused, perfect for creating a romantic or dreamy look, or it can be harsh and direct, creating a bold, energetic mood. It is often used in outdoor shoots, as it can add an element of natural beauty to the image. Available light can also mean any light that is affecting the space where you are shooting. For example, if you are indoors and there are any types of lights on that cast light on your model.

Artificial Light (Strobes or Continuous Lighting):

Artificial light refers to any form of light that is not natural, such as studio lighting or flash photography. It can be used to create a range of moods, from soft and diffused to hard and dramatic. Artificial light can be manipulated to achieve specific effects, such as colored gels, which can add a creative touch to the image. It is often used in studio shoots, where the photographer has more control over the lighting setup.

This image was shot outdoors using just the overcast sky as our light source

This image was shot in studio using strobe lights.

Can you combine them all?

Ab-so-freakin-lutely. Available light (like the sun) can be both soft and hard. An overcast day gives you soft lighting and a bright sunny day will create hard light with harsh shadows. Strobe light can be manipulated to be both soft and hard. The best way to lean is by doing, so play around and create endless possibilities!

If you have questions or want to work with me, please don’t hesitate to reach out.

Blending E-commerce and Editorial Photography: Tips for Stunning Product Shots

Tabio Socks: A case study in making e-commerce imagery ….well, cooler.

In my last blog post, I explained the difference between editorial and e-commerce photography. And in this one, I’m going to explain how we might blend the two. (Getting advanced over here.) When we think of typical e-commerce photos, they are often shot or photoshopped onto a pure white backdrop to make the product really pop without distraction. But do they always have to be?

When I got the email about shooting for the latest Tabio sock launch for 2023 AW, I was thrilled to say yes for a few reasons. Tabio is passionate about quality and craftsmanship. A family company with over six decades of experience creating socks, it was a privilege to work alongside people so passionate about what they are creating. Our talented international team also included styling expertise by Iryna Li and the creative touch of set designer Colin Lytton (highly recommend them both).

E-commerce and Editorial Blended: A Perfect Match

Because the shoot was for e-commerce, our highest priority was making sure a viewing customer could understand exactly what the sock looked like. But we also wanted to tell Tabio’s authentic story of being an exceptionally high-quality sock for fashion-conscious consumers. The images needed some of the edge typically seen in fashion editorial imagery. We accomplished this through a few important factors: lighting, posing, lens choice, and styling. On my end, I planned to use hard light and wide angles. The professional models and stylists played a huge part in keeping the outfits and the posing in the world of fashion as opposed to a more commercial look. (Think Prada versus Old Navy.) I think this combination was really successful and it is my favorite e-commerce shoot to date.

Tips for new photographers and clients:

  • The Tabio shoot is a great example of shooting e-commerce photography with a slight editorial edge. Walking the line between those can make for some dynamic and interesting product shots that still show the product while also telling the brand’s story. No two clients are the same, so the techniques I used here won’t necessarily translate to my next client.

  • Don’t let the fact that the shoot is for e-commerce completely limit the shoot to a pure white void. As you can see here there are always options!

  • In the pre-production process, ask your client to describe their brand and how they’d like their images to look. For example, “cool”, “edgy”, and “fashion forward” versus “soft”, “approachable”, and “natural”. These will all help you choose your lenses and lighting setup.

  • Because this is e-commerce, color correction, texture, and consistency are - and I cannot stress this enough - vital to the shoot.

  • Lighting and color temperature must remain consistent. Adjust as needed for dark darks and light lights.

  • Avoid using any bright-colored lights that might spill onto the product.

  • Avoid distractions: the props in this shoot were successful because they added interest without taking away focus from the product.

If you have questions about ways we can work together or if I can answer any questions, please feel free to reach out!

Navigating the World of Fashion Photography: E-commerce, Lifestyle, and Editorial Explained

In the world of fashion photography, three distinct genres stand out: e-commerce, lifestyle, and editorial photography.

Whether you're a budding photographer looking to specialize or a client seeking the perfect fit for your project, understanding the differences between e-commerce, lifestyle, and editorial fashion photography is essential. Let's unravel the distinct characteristics of each to help you make informed choices.

They serve different purposes and employ unique approaches.

An editorial image for Gilt.

An example of a flat lay of a sweater for Billie Todd.

E-commerce Fashion Photography:

1. Focus on the Product: E-commerce photography's primary mission is to showcase products accurately and persuasively. It's about making the product the star of the show through clean, well-lit, and detailed shots. The goal is to help the viewer get an accurate sense of the product and encourage them to click that "Add to Cart" button.

2. Minimal Distractions: In e-commerce, the focus is on the product, necessitating minimal distractions. Achieved through simple backgrounds, consistent lighting, and precise angles, these elements ensure that the viewer's attention remains on the item for sale.

3. Consistency Matters: E-commerce images adhere to a consistent style and format, making them easily recognizable across an online store. Close-ups and multiple angles are common techniques employed to highlight product details.

4. Technical Precision: E-commerce photographers pay meticulous attention to detail, representing every color, texture, and feature accurately. This precision provides a clear and faithful representation of the product, aiding customers in making informed buying decisions.

Lifestyle Fashion Photography:

1. Real-Life Scenarios: Lifestyle photography places fashion in real-life settings, telling a story or conveying a relatable lifestyle. Models appear engaged in everyday activities, creating a sense of authenticity.

2. Commercial and Relatable: Lifestyle fashion photos are often used for advertising, social media marketing, and brand promotion. Diverse models and relatable scenarios connect with a broad audience.

3. Showcasing Wearability: It's not just about fashion; it's about how it fits into real lives and routines. Clothing is often paired with complementary products or elements to fit the depicted lifestyle.


Lifestyle fashion image shot for Rue La La on the streets of Boston.

Editorial image shot for a magazine feature

Editorial Fashion Photography:

1. Storytelling and Creativity: Editorial photography is an art form focused on narrative weaving, evoking emotions, and storytelling. These images often complement articles and features in magazines, blogs, and other publications. Unlike the standardized look of e-commerce, editorial photography embraces various styles and techniques, ranging from high-fashion extravagance to gritty street photography. The possibilities are limitless. Editorial images often incorporate elements of surroundings, context, and may feature models, landscapes, or props to convey specific moods or themes.

2. Diverse Styles and Themes: Editorial photographers enjoy the freedom to experiment with styles, lighting, and concepts. Editorial images aim to evoke specific moods, themes, or messages, often portraying models as integral parts of the storytelling process through unique poses and expressions.

For New Photographers: Do you have to specialize in just one?

New photographers often grapple with the decision of whether to specialize exclusively in one genre of fashion photography. While specializing can help you hone your skills and build a strong portfolio, it's not a strict requirement. In fact, many successful fashion photographers find value in versatility. Exploring various styles allows you to adapt to different client needs and expand your creative horizons. Starting with a primary focus and gradually incorporating other styles as you gain experience can be a strategic approach. Ultimately, your unique blend of skills and versatility can set you apart in the competitive world of fashion photography.

For New Brands: Do you need all three?

New brands entering the world of fashion often wonder if they need to engage in all three genres of fashion photography simultaneously. The answer depends on your brand's goals and resources. E-commerce photography is essential for showcasing your products effectively. Lifestyle photography can help you connect with your audience on a personal level. Editorial photography, while highly creative, may be reserved for special campaigns or brand storytelling. Many brands start with e-commerce and lifestyle photography to establish their presence and gradually incorporate editorial when the opportunity arises. The key is aligning your photography choices with your brand identity and marketing strategy.

In conclusion, understanding the distinctions between e-commerce, lifestyle, and editorial fashion photography is pivotal for photographers and clients alike. Whether you're seeking to sell a product, convey a relatable lifestyle, or create artistic narratives, each style serves a unique purpose in the dynamic world of fashion photography. So, choose the style that aligns with your vision, project goals, and audience, and let your fashion story unfold.

Ready to explore the world of fashion photography or enhance your brand's visual identity? Reach out to discuss how we can bring your vision to life through the lens. Let's collaborate and create stunning visuals that captivate your audience and tell your unique story.

Nailing Your Modeling Digitals (formerly known as Polaroids): A Photographer's Guide for Models

Whether you are new to modeling or a 20 year veteran, there's one crucial tool you always need in your arsenal: modeling digitals. Also known as "polaroids" these photos are your visual calling card. Digitals or polaroids used to be taken quickly with instant cameras to simply show what a model currently looked like. In today’s industry (with heavy make up and lots of retouching and face sculpting) it’s more important than ever for both agencies and potential clients to be able to see what you look like in your raw and real form. (I’ve had a few photoshoots where the model that walked in was unrecognizable from her instagram images because of heavy face-tuning.)

Digitals can be taken in your agencies office. They can be taken at a professional studio. They can be taken by a friend.

What Are Modeling Digitals?

First things first, let's talk about what modeling digitals are. These shots are all about showcasing your raw, natural beauty, without any (noticeable) makeup or hairstyling. They consist of three or four key shots:

  1. Headshot: Think of it as a close-up selfie, capturing your gorgeous face and expression.

  2. Profile: This shot shows off your side profile, highlighting your unique bone structure.

  3. Full-Length: We'll capture your entire physique, focusing on your posture and proportions.

  4. Swimsuit: For this one, slip into swimwear or a simple outfit that lets your body type shine through.

Keep these tips in mind:

  • No (visible) makeup: Leave the makeup behind; we want your true self to shine through. It’s ok to wear super simple unnoticeable make up, like light concealer and a lip balm.

  • No significant hair styling: Keep your hair natural or how you typically wear it. If you have long hair, find out from your agency if you need images with it down and/or tied back.

  • Simple formfitting attire: Choose basic clothing that highlights your figure without being distracting. Think well-fitting jeans and a plain tee or tank.

  • Find out your agencies needs: It's crucial to understand the exact requirements of your modeling agency or agencies. Different agencies may have specific preferences for modeling digitals.

  • Keep the backdrop simple and clean: A white wall is perfect.

  • Keep the lighting simple: Window light is great, or a natural studio lighting set up also works.

  • Update regularly: Modeling agencies often expect models to update their digitals regularly, typically every six months or as advised by your agency. Be sure to stay on top of this to maintain a fresh and relevant portfolio.

  • Pose Naturally: But don't be afraid to let your personality shine through in your poses. If you smile a lot in real life and on set, you can smile here.

  • No retouching: We want to show your natural beauty, so avoid retouching.

Examples:

Check out the below images to see examples of fresh digitals for Olai Huth. Notice the simple outfits (white and black tee, white tank, and form fitting jean). We shot on a white wall in my studio with no strobe lights, just using the available window light. We shot headshots, profile, full length, and 3/4 in each look so that his agency can choose their favorites.

Behind the Scenes: Capturing the Creative Process of Ane Brun's Latest Music Video in Oslo, Norway

As a photographer, I'm always excited to work with fellow artists. When I was approached to shoot behind-the-scenes footage for Ane Brun's latest music video, “Hand in the Fire” I jumped at the chance.

Ane Brun is a Norwegian singer-songwriter known for her enchanting vocals and poetic lyrics. Her songs are known for their storytelling qualities, exploring universal human experiences such as love, loss, and personal growth. (For Peaky Blinders fans, you’ll recognize her song “All My Tears” from the dramatic season 2 finale!)

For this music video, Ane worked with a team of talented creatives, collaborating with director Shruti Ganguly, Director of Photography Daniel Kedem, and a group of professional dancers from Sweden’s Gothenburg Opera to bring her lyrics to life.

I hope that this post has given you a glimpse into the world of music video production and that you get a chance to check out the video.


CREDITS:

Production Company: Motion Blur @motionblurer

Director: Shruti Ganguly @shrutirya

Producer: Nina Lorentzen @ninalorentzen

DP: Daniel Kedem @danielgkedem

2nd AD: Valentyna Sevostianova @valikokino

Dancers from the Gothenburg Opera @hiroki.ich @rachmacxx @j_koertge and Einar 

Editor: Shay Asheri & Shahar Beeri - @talnathantalents, @shaharbeeri, @shay_asheri

Colorist: Didrik Bråthen @didrikbrathen

Online & Post supervisor: Håkon Stenseng

1st AC: Jonas Skulstad Murstam @jonassmurstam

2nd AC: Rasmus Skåret

Gaffer: Daniel Berrum @danielvazb, @quartz_lys

Best Boy: Tobias Olsen

Key Grip: Bjørn Berger @batman.berger

Costume designers: Nell Knudsen & Isabella Mork @nellknudsen, @thestudiooslo, @thestudiocostume, @bellamork

Stills @siobhanbeasleyphotography

HMU: Soley Astudottir @soleyastudottirmakeup

HMU assistant: Sondre Håland

Production assistant: Benjamin Kristiansen

New Model Development Shoot with Olai: Adding Variety to His Portfolio

I recently had the opportunity to work with a new model named Olai, who had just signed with a modeling agency in New York. As a new model, Olai needed images to add to his portfolio, so we set up a development shoot in my studio in Oslo.

During the shoot, we worked on capturing a variety of different looks and moods, to showcase Olai's range on camera. Olai has a great bone structure so it was easy to capture some strong shots.

One of the challenges of working with a new model is helping them feel comfortable and relaxed in front of the camera. As we got into the shoot and started trying different things, he really began to loosen up and enjoy himself. It's always rewarding as a photographer to see someone come out of their shell and start to really shine on camera.

I was really pleased with the results of the shoot. We captured a great variety of images that really show off Olai's potential as a model. I'm confident that these photos will help him stand out to potential clients and book more jobs in the future.

Here are a few of my favorite shots from the shoot:

Remembering Rana Plaza 10 Years Later: A Wake Up Call to the Fashion Industry

24 April 2013, a fashion factory building in Bangladesh collapsed, killing 1,134 people and injuring over 2,500. The factory was producing clothes for global brands such as Primark, Mango, and Benetton, among others.

The Rana Plaza incident brought to light the poor working conditions and lack of safety regulations in the garment industry. It sparked outrage and protests around the world, and it prompted the creation of the Fashion Revolution movement, which encourages consumers to ask "Who made my clothes?" and demand greater transparency and sustainability in the fashion supply chain.

The Rana Plaza incident is a reminder that our clothes have a human cost. The people who make our clothes deserve fair wages, safe working conditions, and respect for their human rights.

It is not by coincidence, but by design, that within the global fashion industry, garment worker wages are artificially low and that brands continue to source from regions where it is impossible, difficult and/or unsafe for workers to form trade unions and bargain for greater rights - Fashion Revolution

Rana Plaza 24 April 2023

As consumers, we have the power to demand change in the fashion industry. How? By choosing to support sustainable and ethical fashion brands, reducing our own consumption, and demanding greater transparency and accountability from the fashion industry, we can make a difference.

Join the Fashion Revolution movement and ask #whomademyclothes. Together, we can create a better future for the fashion industry and for the people who make our clothes.

To learn more about Fashion Revolution click here.


How to Create Beautiful Butterfly Lighting for Portraits

Butterfly lighting is a popular technique in portrait photography that creates a soft, flattering light on your subject's face. This lighting setup is named after the butterfly-shaped shadow it creates under the nose. In this blog post, we'll go over the equipment you'll need and the steps to set up butterfly lighting for your portrait photography.

Equipment Needed:

  • One light (ideally softbox or umbrella style)

  • Light stand

  • Reflector (optional)

Steps to Set Up Butterfly Lighting:

  1. Position your main light at a 45-degree angle to your subject's face, slightly higher than eye level. This will create a soft, diffused light that wraps around their face.

  2. Adjust the height and angle of the light until you achieve the desired shadow effect.

  3. If needed, use a reflector to bounce some light back onto your subject's face and reduce shadows.

How to Use Clamshell Lighting for Stunning Portrait Photography

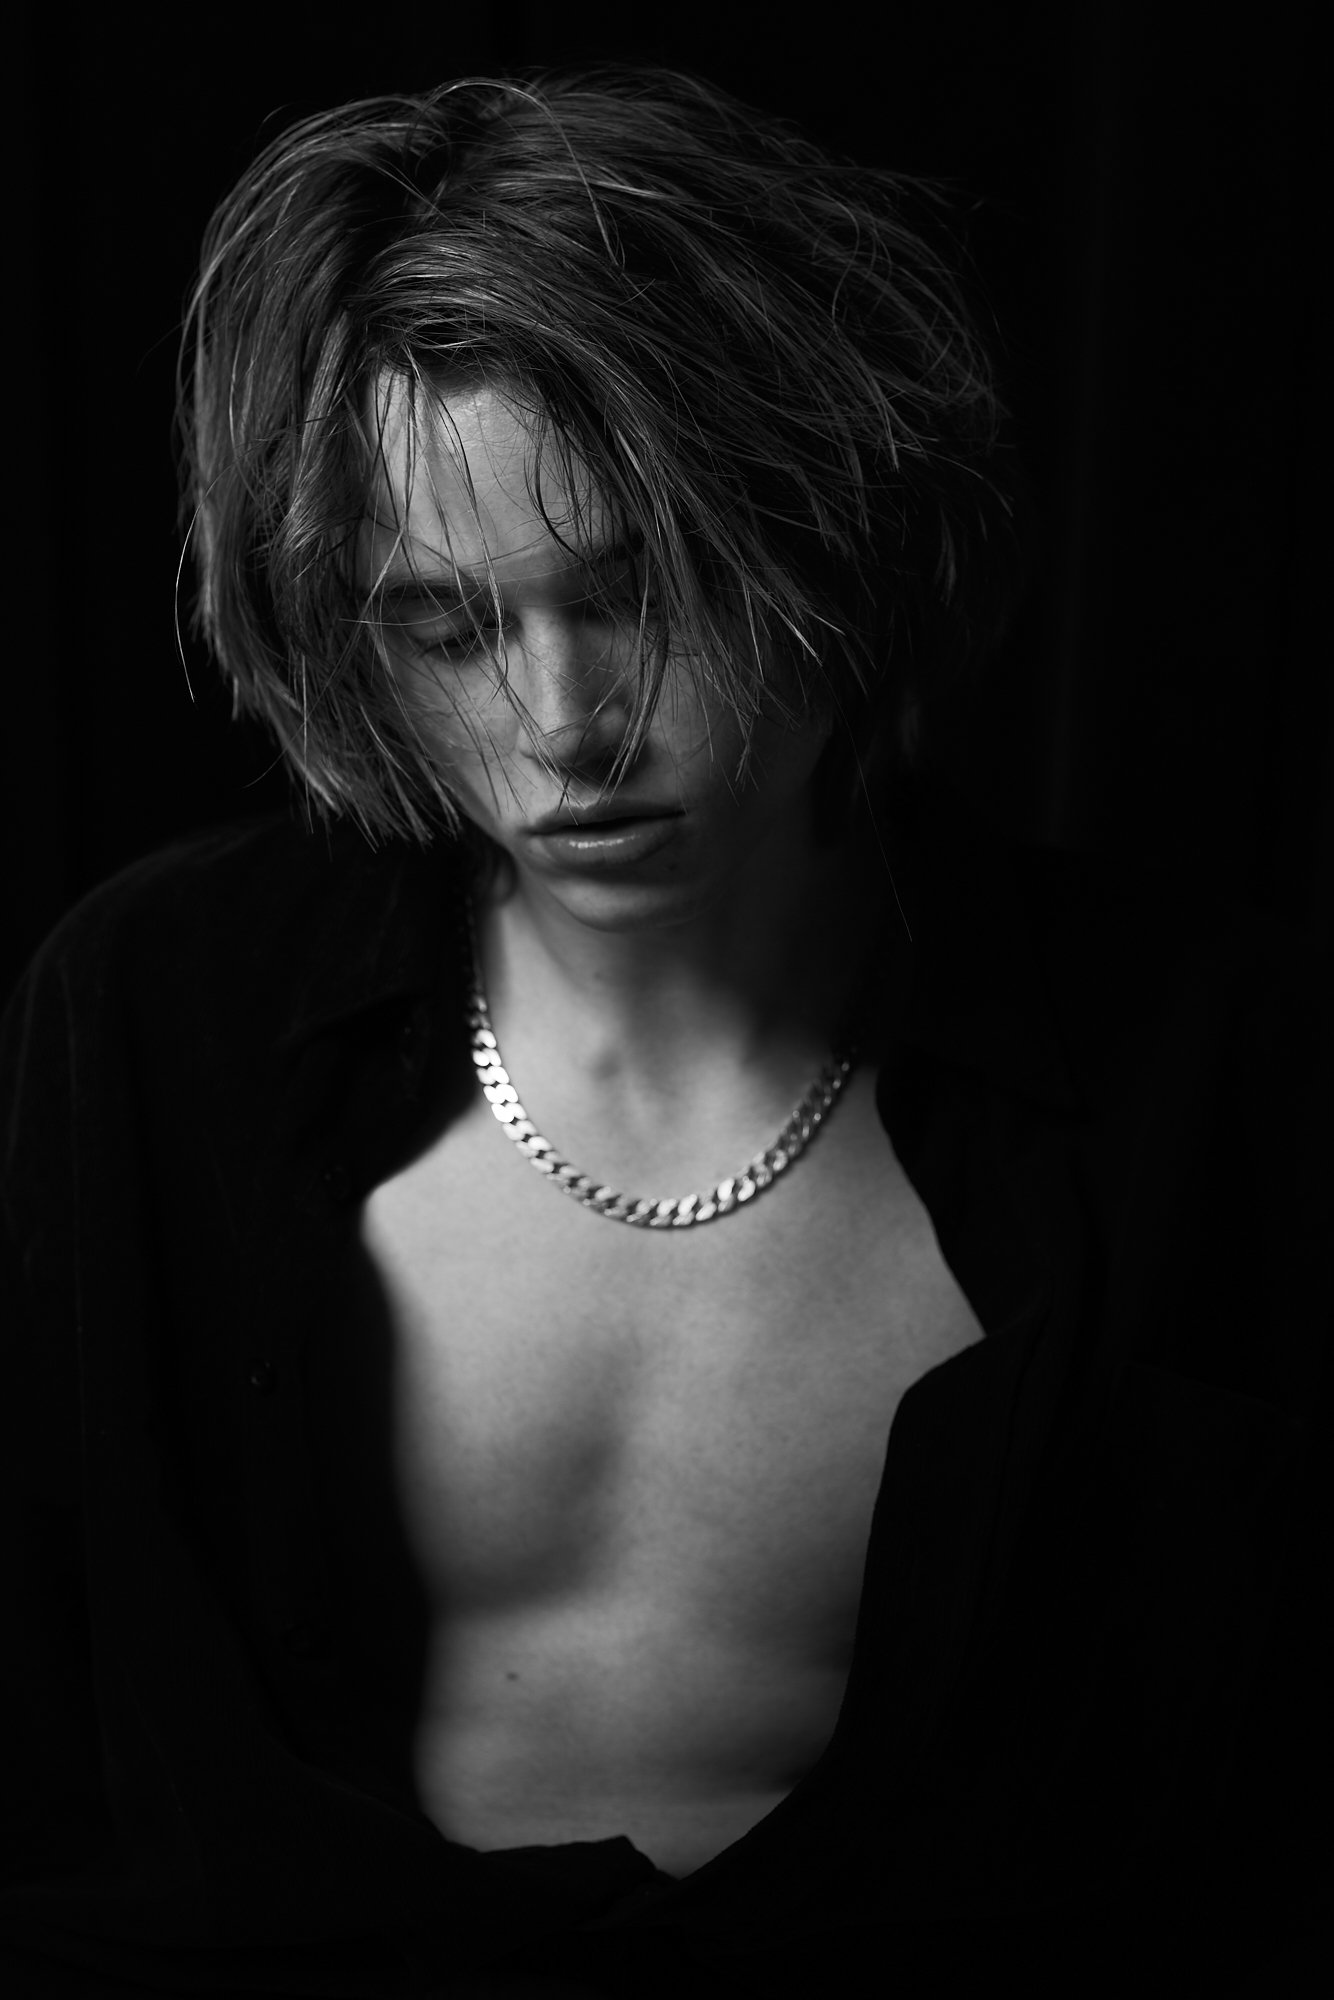
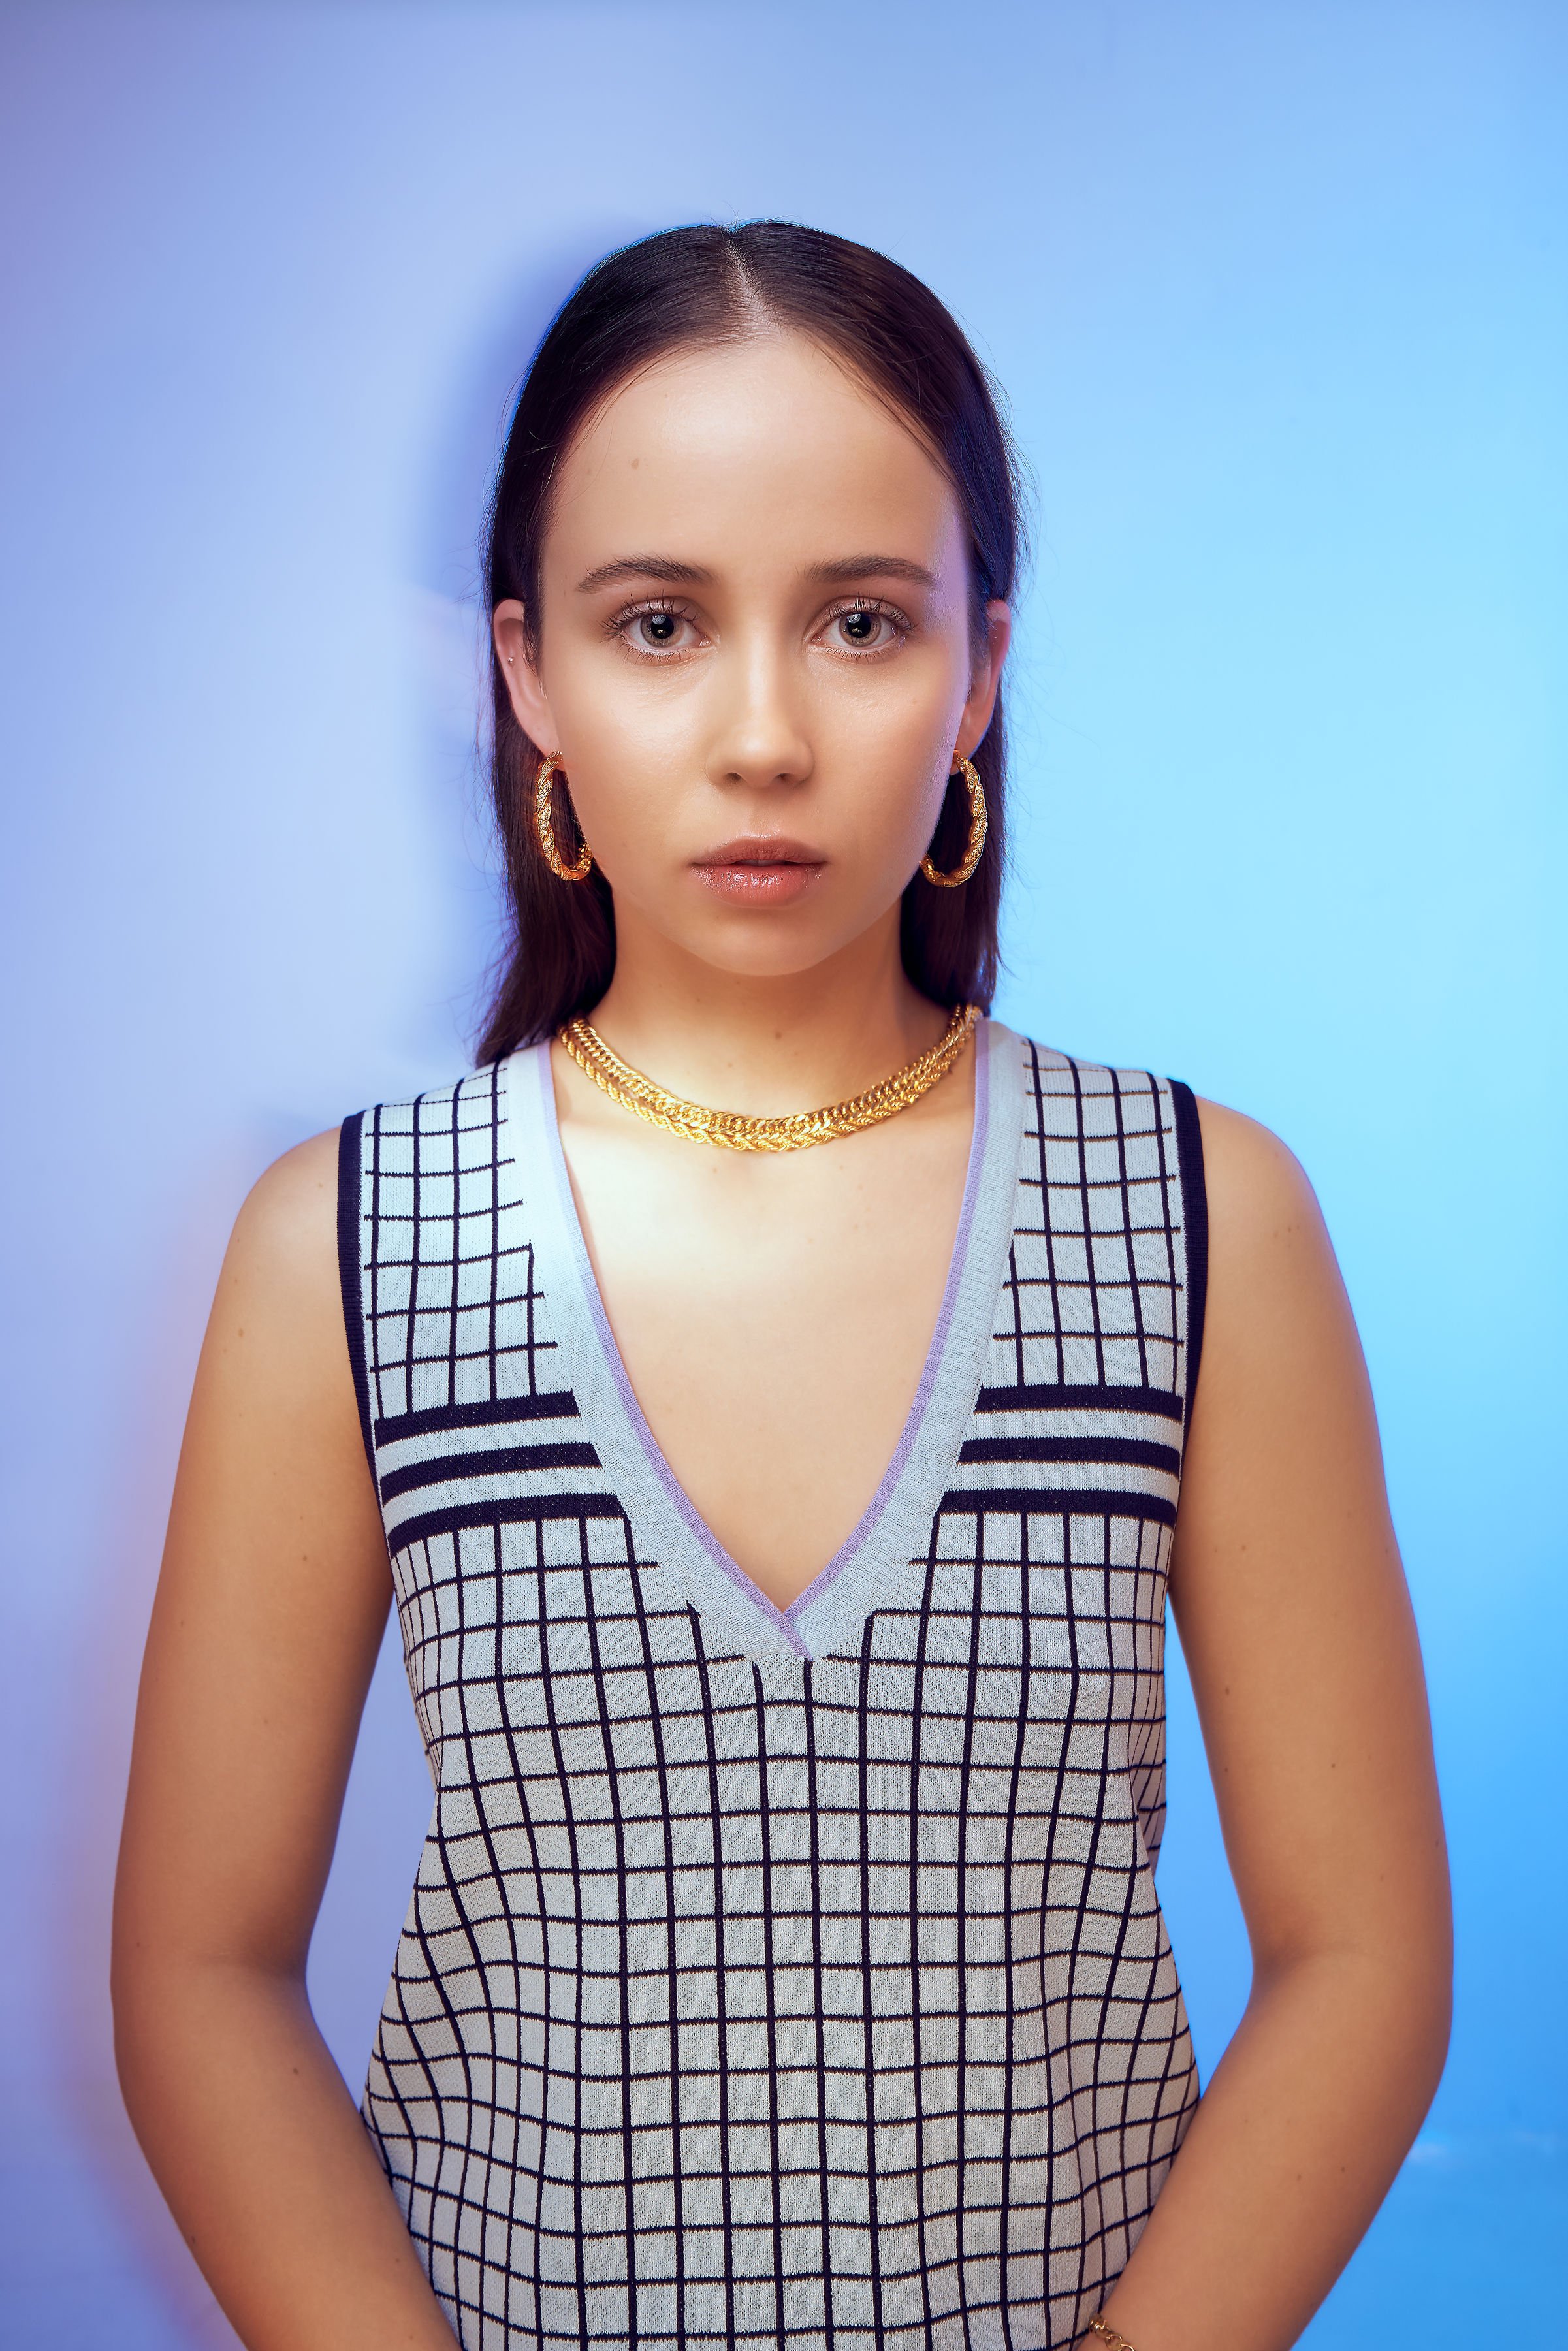
Clamshell lighting is a popular lighting technique in portrait photography that involves using two lights or a light and a reflector to create a soft, flattering light on your subject's face. The name comes from the fact that the two lights resemble the shape of a clamshell when set up correctly.

In this blog post, we'll explore how clamshell lighting works, what equipment you need, and how to set it up for your own portrait photography.

How Does Clamshell Lighting Work?

Clamshell lighting involves using two lights (or one light and one reflector): a larger light source above your subject's face (known as the key light) and a smaller light source or reflector below their face (known as the fill light). The key light provides most of the illumination, while the fill light helps to reduce shadows and add definition to your subject's features.

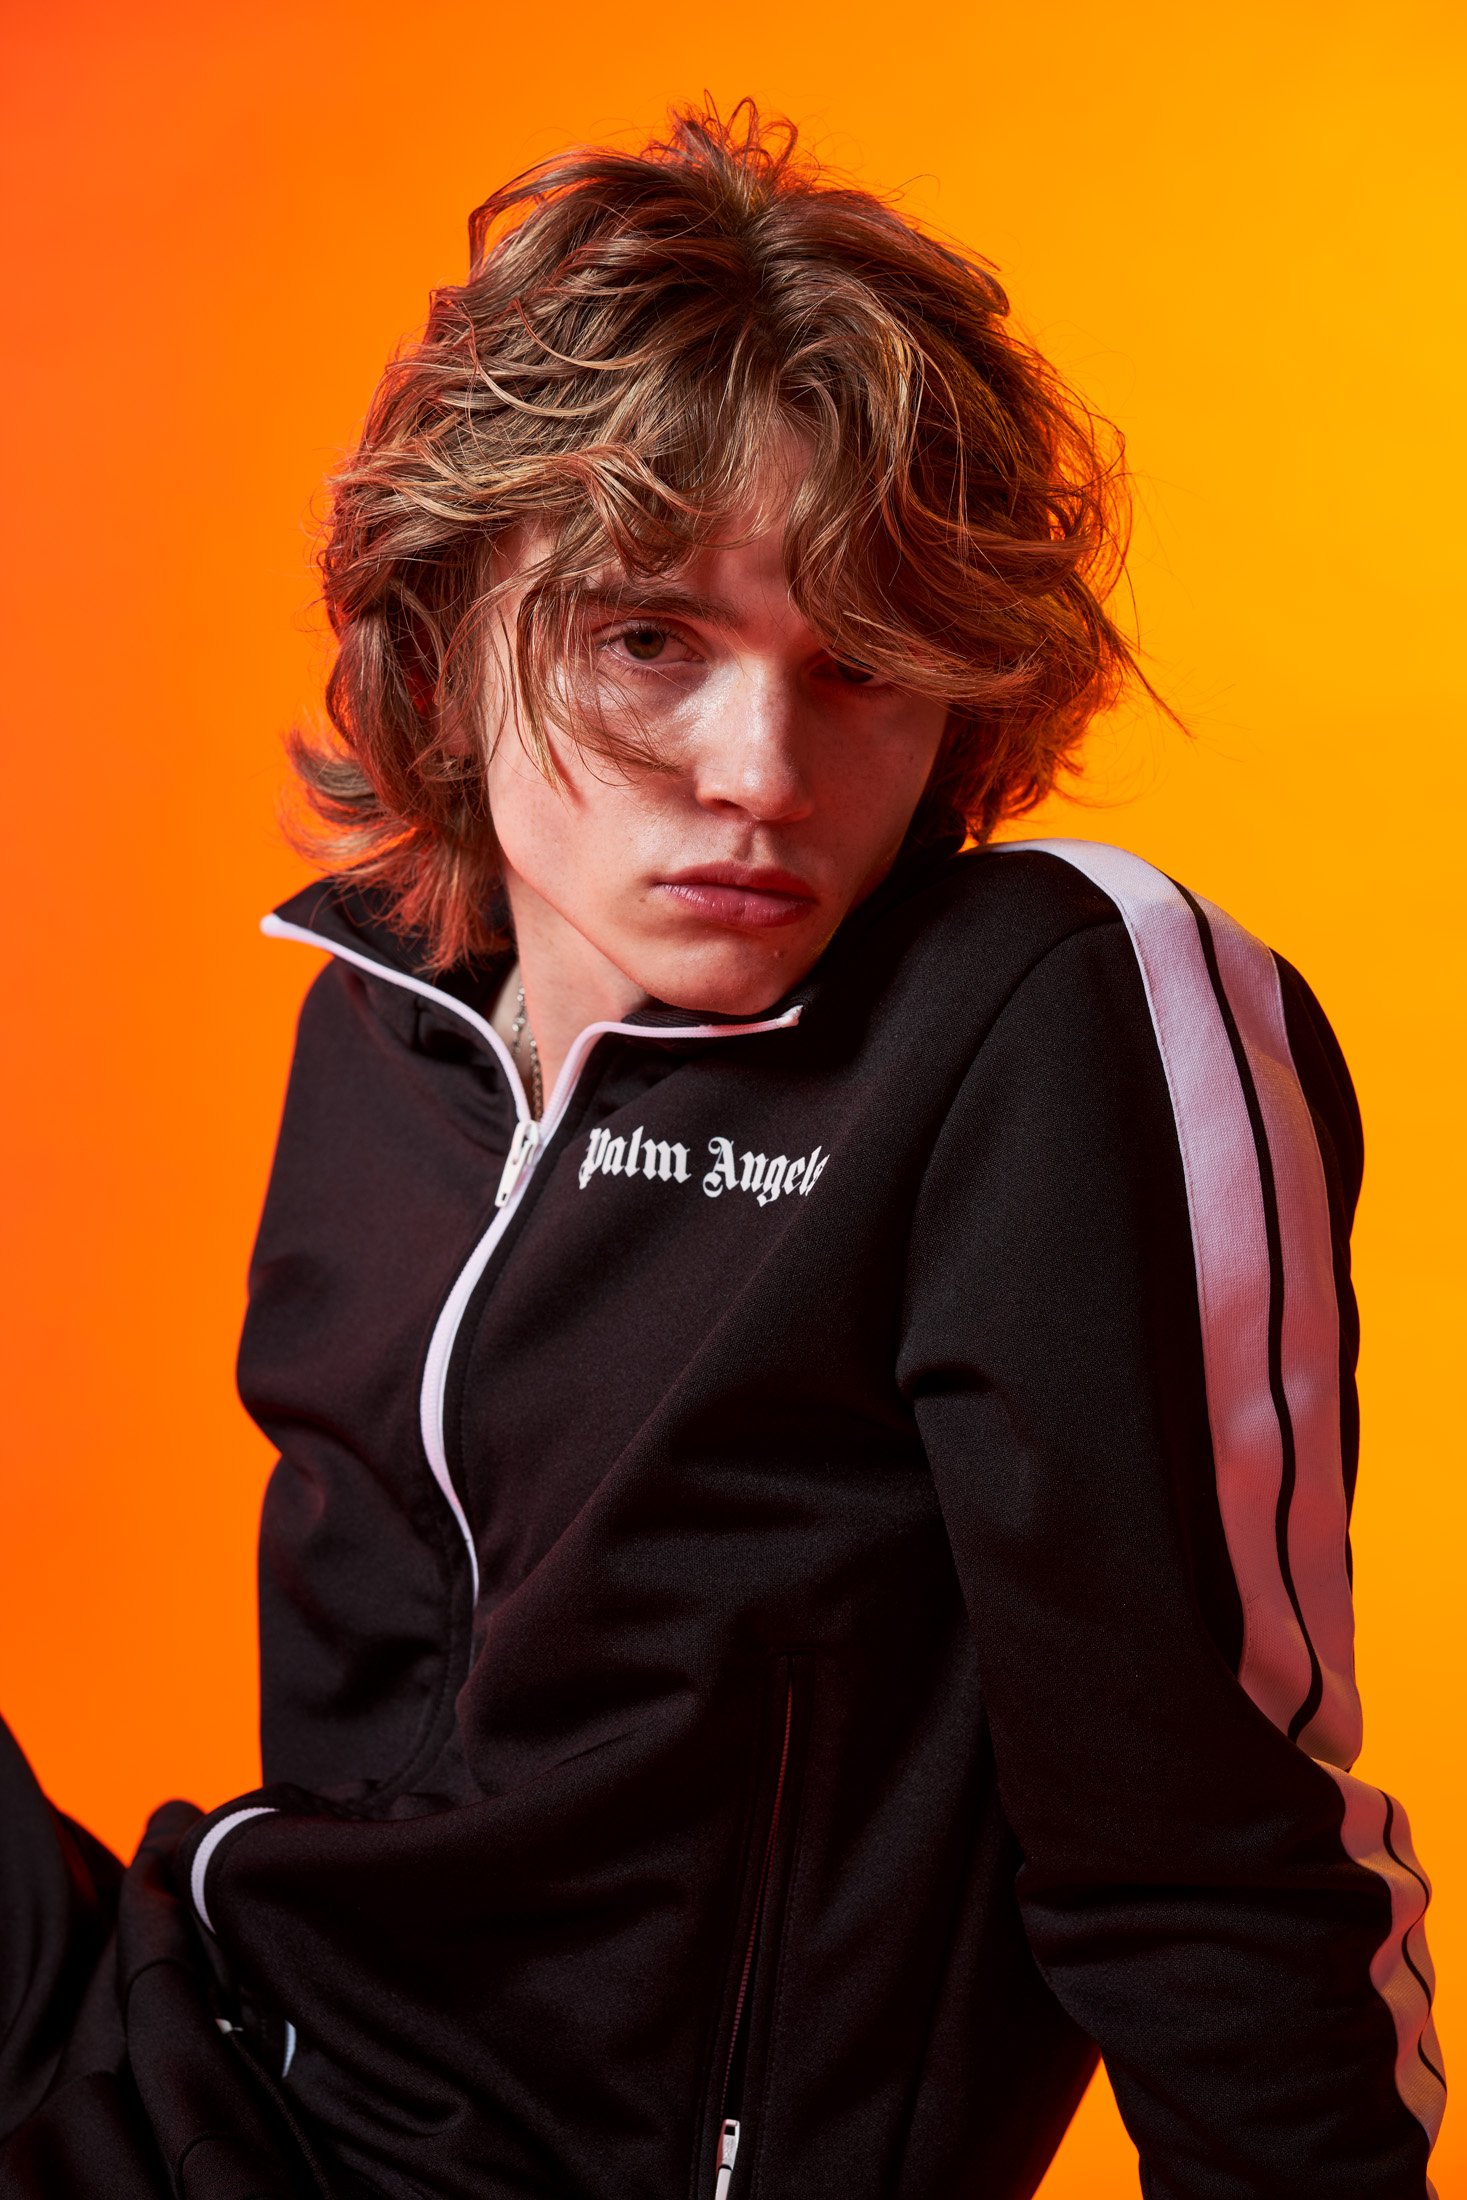
This lighting setup is particularly effective for portrait photography because it creates a soft, flattering light that brings out your subject's natural features. By placing the lights in a clamshell formation, you can also help to minimize any harsh shadows or unflattering angles on your subject's face.

What Equipment Do You Need?

To create clamshell lighting, you'll need two light sources, such as studio strobes or speedlights (or one light source and one reflector). You'll also need light stands, softboxes or umbrellas to diffuse the light, and triggers to fire the lights remotely.

When it comes to the size and power of the lights you use, this will depend on the size of your subject and the distance between the lights and your subject. Generally, you'll want to use a larger, more powerful light source as your key light, and a smaller, less powerful light source (or reflector) as your fill light.

How Do You Set It Up?

To set up clamshell lighting, start by placing your key light directly above your subject's face. This light should be angled down slightly to create a soft, even light on their face.

Next, position your fill light directly below your subject's face. This light should be angled up slightly to help fill in any shadows and add definition to your subject's features.

Finally, adjust the distance between the lights and your subject as needed to achieve the desired effect. You may need to experiment with different distances to get the perfect balance of light and shadow on your subject's face.

Wrapping Up

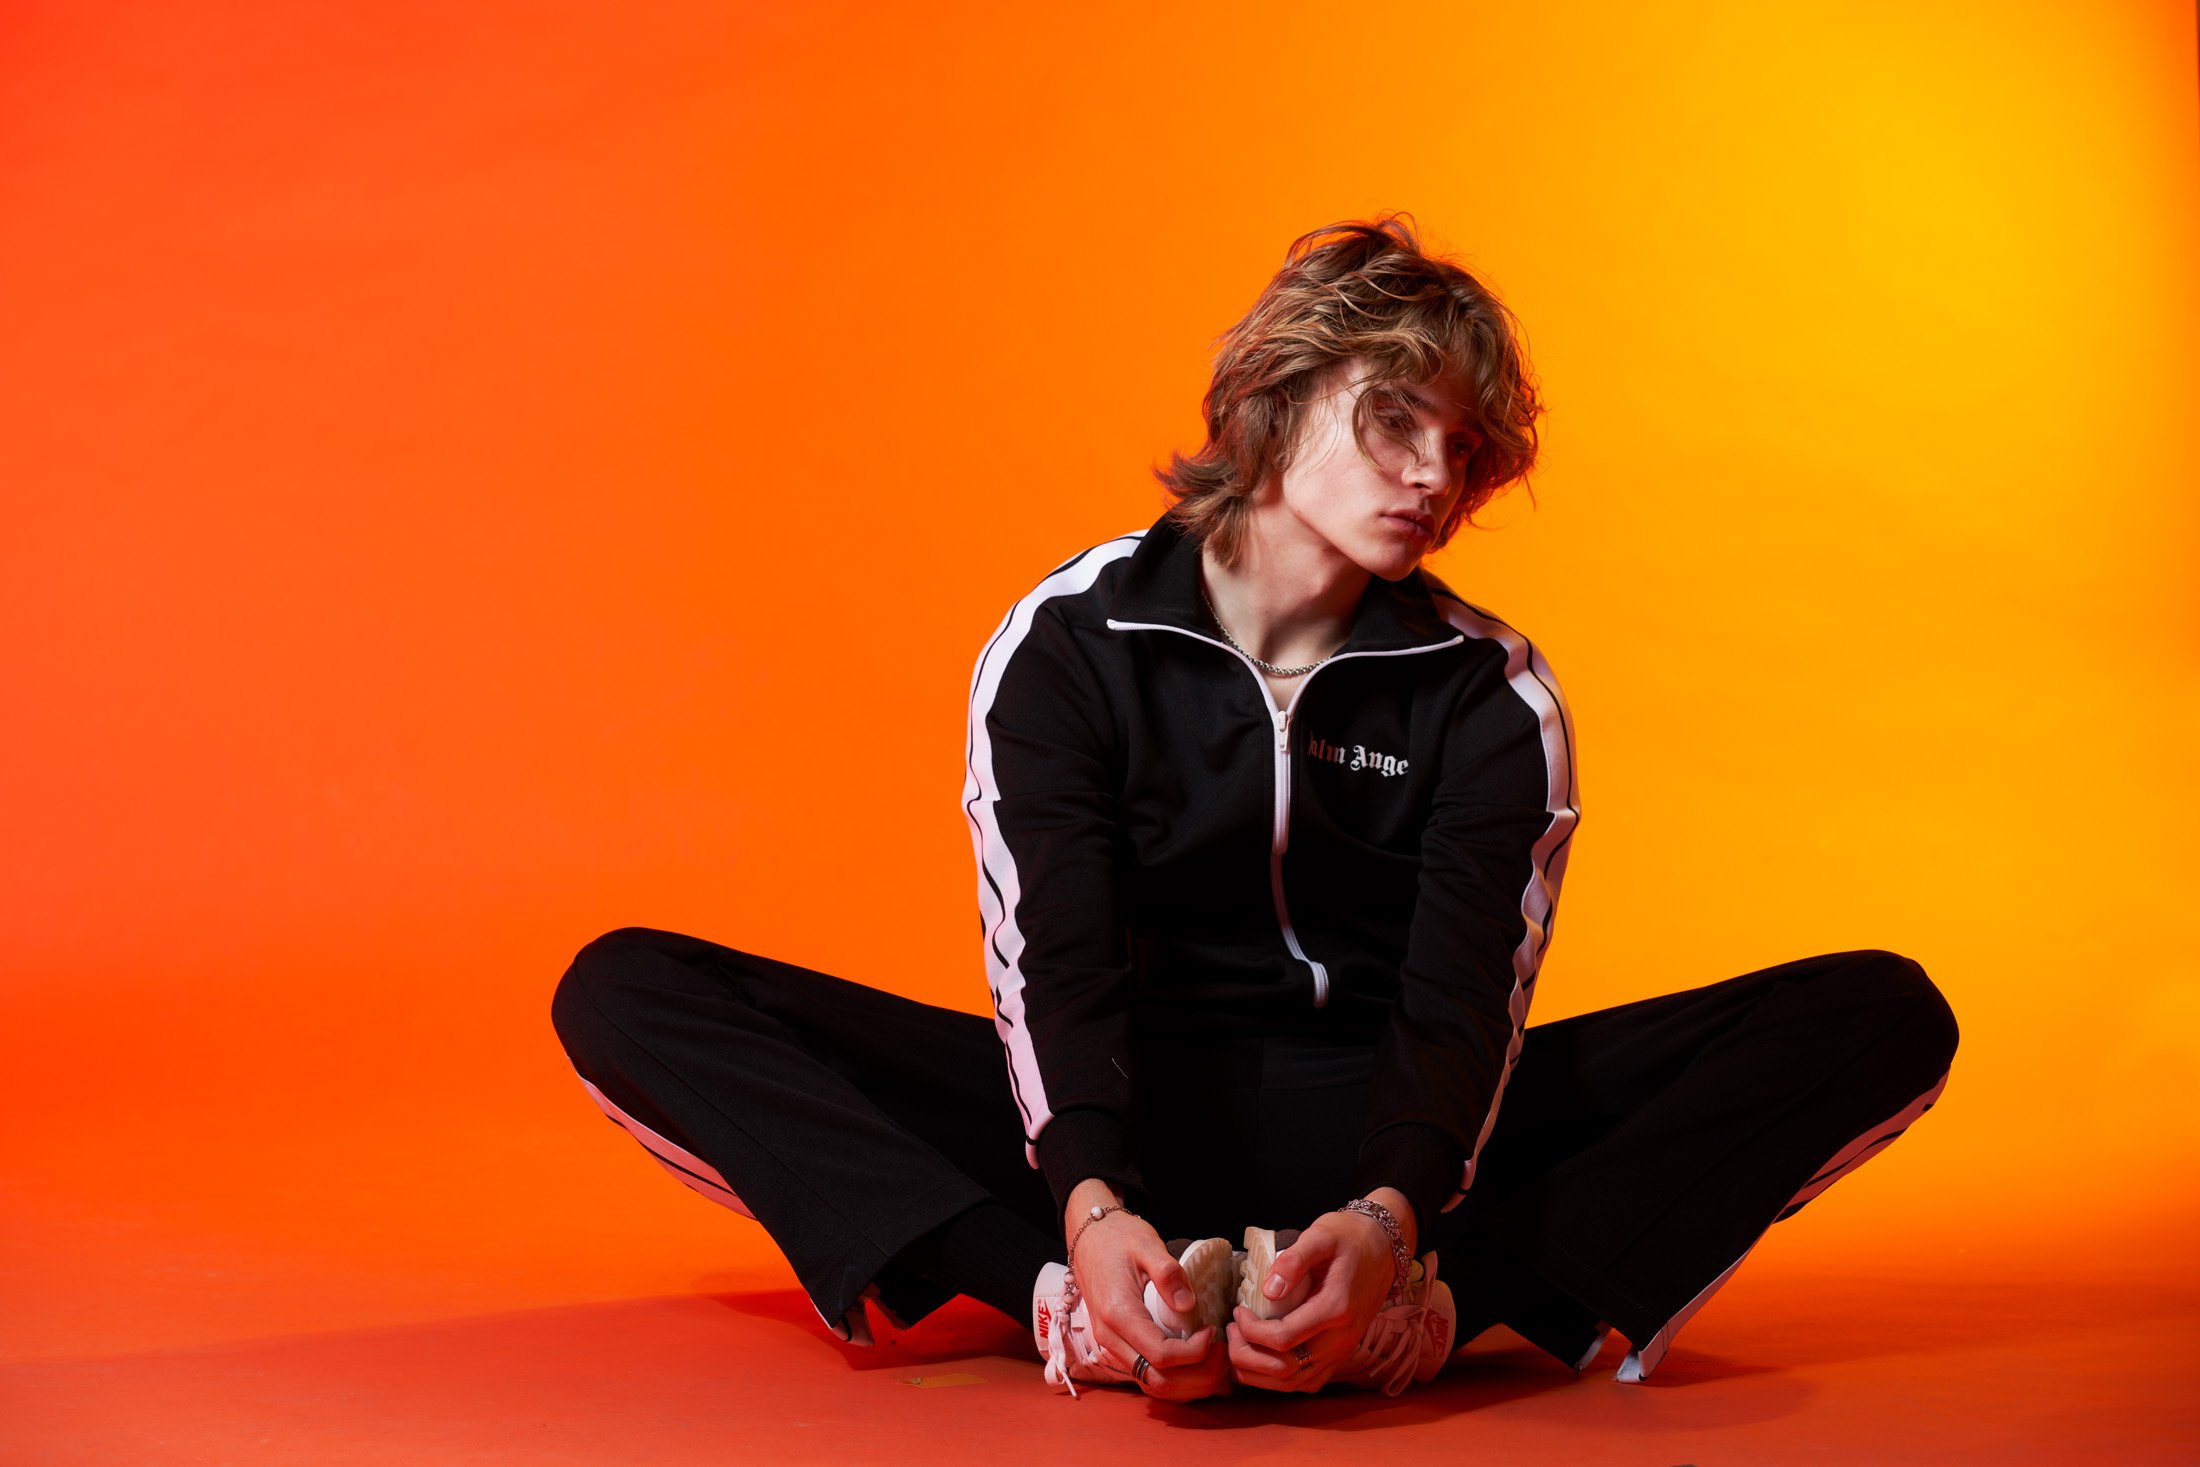
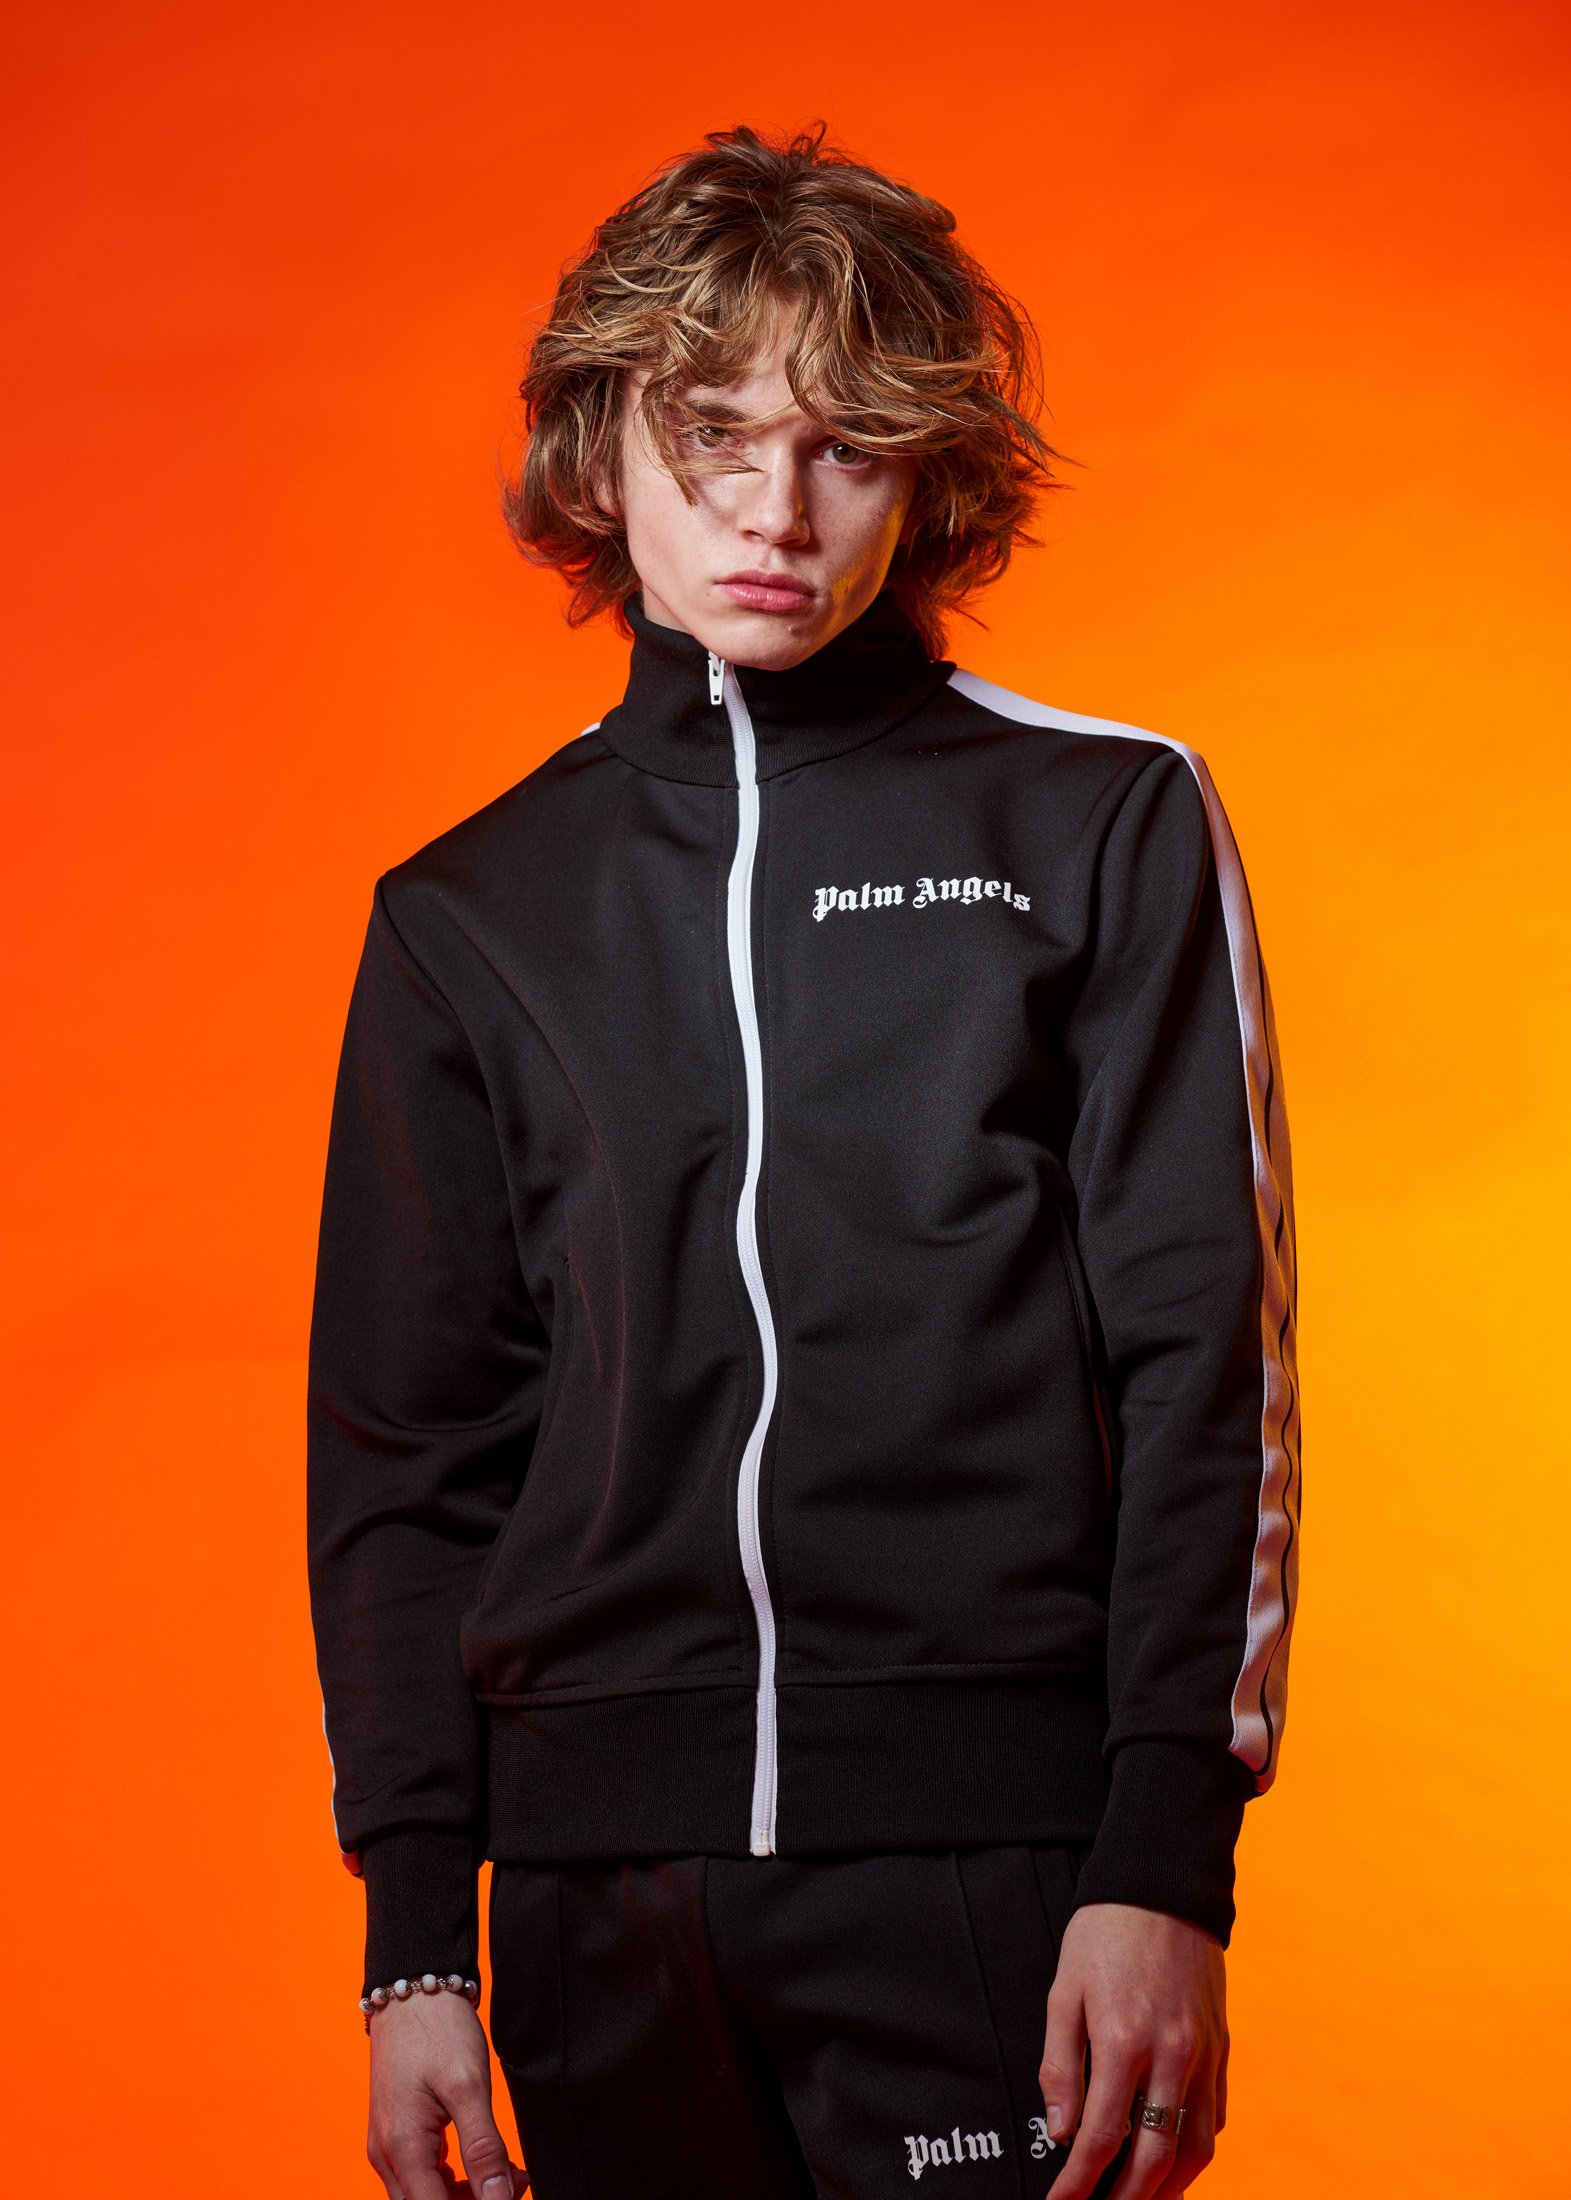
Clamshell lighting is a highly effective technique for portrait photography, providing a soft, flattering light that brings out your subject's natural features.

With the right equipment and a bit of practice, you can start using clamshell lighting to elevate your portrait photography game and capture stunning, flattering portraits that your clients will love.

The True Cost of Fashion Photography

Fashion photography is an essential component of any fashion brand's marketing strategy. It helps showcase the brand's products and convey its unique style and vision. But what is the cost of a fashion photo shoot? The answer varies depending on various factors, such as the location, the number of models, the photographer's experience, and the intended usage of the photos. The cost of a fashion photoshoot can vary depending on several factors, including the cost of hair and makeup, stylist fees, location or studio fees, lighting gear, and props. Let's take a closer look at each of these factors and how they contribute to the overall cost of a fashion photoshoot. Note: It’s important to be realistic about your budget, and what you can and can’t afford. If your goal is to work with professionals, a day-long shoot can easily begin at around $10,000.

  1. Photographer's fee: The cost of hiring a photographer for a fashion photo shoot can range depending on their experience, reputation, and location. Typically, commercial photographers charge anywhere from $1,000 to $5,000 or more per day. The photographer's fee usually includes their time and expertise during the shoot. Some photographers may also charge an additional fee for post-production work, such as editing and retouching.

    It's important to keep in mind that the final cost will depend on the specific details of the project, and it's always a good idea to discuss pricing and expectations with the photographer before hiring them.

  2. Model's fee: Models are typically paid per hour or per day, and the cost can vary depending on their level of experience and the type of shoot. For a fashion photo shoot, a professional model may charge anywhere from a few hundred to several thousand dollars.

  3. Usage licensing: The usage licensing fee is often overlooked but is a critical factor in determining the total cost of a fashion photo shoot. The licensing fee grants the brand permission to use the photos for a specific purpose, such as social media, website, print ads, or billboards. The cost of licensing varies depending on the intended usage, the length of time the brand plans to use the photos, and the geographic area.

  4. Hair and Makeup: Hair and makeup are essential components of a fashion photoshoot. They help to enhance the overall look and feel of the shoot and ensure that the models look their best. Hair and makeup artists typically charge per hour, and the cost can vary depending on the artist's level of experience and location. On average, the cost of hair and makeup for a fashion photoshoot can range from $200 to $1,000 or more.

  5. Stylist: A stylist is responsible for selecting the clothing and accessories for the photoshoot. They work closely with the photographer and the client to ensure that the overall look and feel of the shoot aligns with the client's vision. The cost of a stylist can vary depending on their level of experience and the complexity of the shoot. On average, the cost of a stylist for a fashion photoshoot can range from $500 to $3,000 or more.

  6. Location or Studio Fees: The location or studio where the photoshoot takes place can also impact the overall cost of the shoot. If a location is required, the cost can vary depending on the location's popularity, accessibility, and rental fees. Studio fees can also vary depending on the size and equipment available. On average, the cost of location or studio fees for a fashion photoshoot can range a few hundred dollars to several thousand dollars per day. Studios typically charge by the hour or day, with rates ranging from $100 to $1,000 or more per hour depending on the size and amenities of the studio.

  7. Lighting Gear: Good lighting is essential to any successful fashion photoshoot. The type of lighting gear needed will depend on the specifics of the shoot, but generally, you can expect to pay anywhere from $300 to $2,000 or more for lighting equipment.

In conclusion, the cost of a fashion photo shoot varies depending on various factors. It's crucial to factor in all these expenses when planning a photo shoot to avoid any surprises or hidden costs. Working with a professional and experienced photographer can help ensure that the final images are of high quality and meet the brand's vision and objectives.

Embed Block
Add an embed URL or code. Learn more

Sustainable Fashion Photoshoot: How to Make Your Shoot Eco-Friendly

Let's face it, the fashion industry is not known for its eco-friendliness. But as the world becomes more aware of the impact we're having on the environment, it's important for all of us to do our part to reduce waste and be more sustainable. That includes photoshoot sets. Here are some tips to help make your next fashion shoot a little more environmentally friendly:

  1. Rent or borrow props and wardrobe items when possible. Instead of buying new items for the shoot, consider renting or borrowing from other photographers or stylists. This not only reduces waste, but also saves you money.

  2. Use natural light when possible. (I’m a huge fan of strobes, so this one is personally hard for me).

  3. Bring reusable water bottles and food containers. Instead of using disposable cups and plates, bring reusable water bottles and food containers. This reduces waste and keeps the set looking cleaner.

  4. Recycle and compost. Make sure there are designated recycling and compost bins on set, and encourage everyone to use them.

  5. Use eco-friendly cleaning products. When cleaning up after the shoot, use eco-friendly cleaning products instead of harsh chemicals that can harm the environment.

By following these simple tips, you can make your fashion photoshoot more sustainable and reduce your impact on the environment. Plus, you'll feel good knowing that you're doing your part to make the world a little greener.

What to Expect When You're Expecting A Fashion Photoshoot: Tips for New Brands

Are you a new fashion brand preparing for your first photoshoot? Planning a photoshoot can be overwhelming, especially if it's your first time. But don't worry, I’ve got you covered! Here are some things to keep in mind as you plan for your big day:

  1. Start With A Clear Vision: Before you start planning your photoshoot, have a clear vision of what you want to achieve. Think about the style, mood, and aesthetic you're going for. Create a mood board that incorporates your overall vision as well as your vision for hair, make-up, styling, posing, and lighting.

  2. Set A Realistic Budget: A photoshoot can be expensive, so make sure you set a realistic budget. Consider all the costs, including the photographer, models, stylists, hair and make-up, location, props, and equipment.

  3. Find The Right Photographer: Finding the right photographer is key to a successful photoshoot. Look for someone who specializes in fashion photography and whose style aligns with your vision.

  4. Styling: The right styling is key to making your photoshoot a success. Choose models, hair and makeup artists, and wardrobe stylists who align with your brand's aesthetic.

  5. Timeline: Plan your shoot day with a detailed timeline that includes the arrival of the team, hair and makeup, wardrobe changes, and breaks.

  6. Plan Ahead: Planning ahead is crucial. Make sure you have everything you need, including the right props, wardrobe, and equipment days in advance. Do you need transportation? Is there enough parking for everyone? Bring snacks, water, and if it is a full day, plan lunches for everyone on set.

  7. Props and Set Design: Props and set design can help you tell a story and bring your vision to life. Be sure to choose props and set designs that complement your brand and message.

  8. Communication: Communication is key to a successful photoshoot. Be clear about your expectations and communicate effectively with your team to ensure everyone is on the same page.

  9. Be Flexible: No matter how well you plan, things may not go exactly as expected. Be flexible and ready to adapt to any changes or challenges that arise.

Planning a photoshoot takes time and effort, but with the right preparation, it can be a fun and rewarding experience. Good luck with your shoot!

Don’t hesitate to reach out if you have any questions!

5 Essential Tips for Photo Assistants to Impress Your Photographer

As a photographer, having a good assistant can make all the difference. Whether you're a seasoned pro or just starting out, having an assistant who knows the ropes and can help you out on set is essential. But what are the top things that an assistant should be doing to be helpful to the photographer? Here are my top 5:

  1. Be prepared: As an assistant, your job is to help the photographer in any way possible. This means being prepared for whatever might come up on set. Make sure you have all the equipment and supplies that the photographer needs, and have them ready and organized. This can include everything from camera gear to extra batteries to snacks and water. Photographers frequently forget to drink water all day on set. During breaks in the shoot, throw a water bottle to the photographer and force them to hydrate.

  2. Be proactive: One of the best things that an assistant can do is to be proactive. This means anticipating the photographer's needs and taking action before they have to ask. For example, if you see that the photographer is running low on battery power, offer to switch out the batteries for them.

  3. Be attentive: As an assistant, it's important to be attentive to the photographer's needs and to the details of the shoot. This means paying attention to everything from the lighting to the composition to the model's wardrobe. Being attentive can help you catch any potential problems before they become bigger issues, and can help the photographer get the shot they're looking for. This also means staying off your phone!

  4. Be flexible: Photoshoots can be unpredictable, and things don't always go according to plan. As an assistant, it's important to be flexible and to be able to adapt to changing circumstances. This might mean being ready to switch up the lighting or the composition at a moment's notice, or being willing to help out with tasks that are outside of your usual job description.

  5. Be respectful: Finally, it's important for assistants to be respectful of the photographer and the rest of the team on set. This means being punctual, being professional, and following any rules or guidelines that are set out. It also means being courteous and respectful to everyone you encounter on set, from the models to the makeup artists to the client.

By following these top 5 tips, photo assistants can be a huge asset to the photographer and the rest of the team on set. So if you're an aspiring assistant, keep these tips in mind and you're sure to make a great impression!

How to Achieve Ethereal and Dreamy Photos for Your Fashion Photography Portfolio

Are you looking to capture ethereal and dreamy photos for your fashion photography portfolio? Here are some tips to help you achieve that beautiful, otherworldly look in your photos using natural light.

  1. Shoot during golden hour, or on an overcast day: To achieve a soft, dreamy effect, it's important to shoot during the "golden hours" of sunrise and sunset, when the light is warm and diffused. Avoid harsh midday sunlight, which can create unflattering shadows. If you live in a place with fog or overcast weather this can also create that diffused natural light we are looking for. If you can’t shoot when the sun is low, backlighting your subject will also help give that dreamy glow.

  2. Experiment with aperture: Use a wide aperture (a low f-number, 1.4, 1.8, 2.8) to create a shallow depth of field, which will blur the background and make your subject pop. This will help add to the dreamy feel of your photos.

  3. Choose soft and light colors: Choose light and soft color schemes for your clothing and props. Think pastels, white, cream. These colors will add to the ethereal feel of your photos.

  4. Incorporate movement: Movement in your photos can add to the dreamy effect you're going for. Have your subject twirl, dance, or walk to create a sense of movement in your photos.

  5. Experiment with shutter drag. Keeping the shutter open for longer than you ordinarily would can create a lovely ethereal blur.

  6. Experiment with placing translucent items in front of the camera lens. These can create dreamy effects that can also help soften the edges of the image.

  7. Post-processing: After you've captured your photos, play around with post-processing to create a dreamy effect. You can adjust the contrast, clarity, saturation, and temperature of your photos to create the perfect ethereal look.

Happy shooting!

Fashion Photography Fails: How to Avoid the Top 8 Mistakes

Fashion photography is an art form that requires careful attention to detail and an eye for beauty. As a new fashion photographer, it's important to avoid common mistakes that can ruin your shots and leave your clients disappointed. Here are 7 mistakes to avoid:

  1. Ignoring the importance of lighting: Lighting can make or break a photo, so it's important to pay attention to it. Make sure the model is well-lit and that the lighting complements the clothing and the mood you're going for. Experiment with different lighting setups and don't be afraid to try something new.

  2. Not paying attention to the background: When shooting fashion photos, it's important to pay attention to the background. An eye-catching background can add depth and interest to your photos, but a distracting one can take away from the main subject. So, always be aware of what's in the background and make sure it complements the model and the clothing.

  3. Not communicating with the model: It's important to have a good rapport with the model you're working with. Communicate with them and make sure they understand what you're looking for in terms of poses and expressions. This will help you get the shots you want and make the model feel more comfortable and confident in front of the camera.

  4. While posing is important in fashion photography, overposing can make the model look stiff and unnatural. Encourage the model to move around and be playful. This will help you capture more authentic and dynamic shots.

  5. Over-editing the photos: While editing can enhance the overall look of a photo, overdoing it can make the image look unnatural and detract from the beauty of the subject. Avoid over-editing and focus on enhancing the natural beauty of the image.

  6. Neglecting to plan ahead: Planning is essential in fashion photography. Make sure to plan the shoot ahead of time, including the location, the outfits, and the props.

  7. Not considering makeup and hair: Makeup and hair can make or break a fashion shoot. Make sure to collaborate with a professional makeup artist and hairstylist to ensure the model looks their best.

  8. Not being prepared for the unexpected: Anything can happen on a photoshoot, so it's important to be prepared. Bring backup equipment, clothing options, and props in case something goes wrong.

All that said, fashion photography is all about creativity and pushing boundaries. Don't be afraid to try new things, experiment with different angles, and think outside the box. Most importantly, have fun with it!

From Awkward to Awesome: How to Pose Like a Pro in Front of the Camera

Do you cringe every time you see a camera pointed at you? Fear not, my friend! As a photographer, I often hear people say that they don't feel comfortable in front of the camera. It's understandable - being the center of attention can be nerve-wracking. But there are some simple tips and tricks you can use to feel more relaxed and confident in your poses.

  1. Relax your body: Easier said than done, but start by taking a deep breath and letting go of any tension in your body. Shake it out. Literally. Pretend you're a puddle of melted butter or a noodle. Relax your hands and fingers.

  2. Move: From that place of zen relaxation, move around. Shift your weight from one foot to the other, and move back and forth. Look at the camera and away from the camera. Keep experimenting and changing it up. This isn’t 5th-grade school portraits so there is no need to stay in the same position.

  3. Find your angles: Everyone has different angles that flatter them the most (even professional models). Try turning your body slightly to the side, or tilting your head to one side or the other. Experiment with different poses and angles to see what looks best on you.

  4. Use props: Props can be a great way to add interest and depth to your photos, and they can also give you something to do with your hands. Try holding a bouquet of flowers, a coffee mug, or a book. Just make sure the prop fits the mood and style of the photo.

  5. Interact with your environment: Use your environment to your advantage by leaning against a wall, sitting on a bench, or standing on a staircase. Interacting with your environment can help you feel more natural and at ease in your poses.

  6. Embrace Your Quirks and Have Fun: Don't be afraid to let your unique personality shine through in your photos. Whether it's a goofy facial expression or a weird dance move, embrace your quirks and have fun with it. Don't take yourself too seriously, and remember that your unique personality and energy will shine through in your photos.

Now go forth and strike a pose!

Capturing the Fun Side of Norwegian Jewelry: A Colorful Photoshoot with Miss Mathiesen

For this jewelry campaign shot in Oslo, Norway, our goal was to produce modern colorful imagery featuring Norwegian creatives in the fashion and beauty fields.

I recently had the pleasure of working with a fun and colorful Norwegian jewelry brand, Miss Mathiesen, and was thrilled to bring their colorful and unique pieces to life. Our goal was to showcase the youthful, fun and vibrant side of their brand, while also highlighting the beauty of their products.

From bold statement necklaces to earrings, we experimented with different styles and poses to create a visual story that perfectly represented their brand. We utilized a range of colorful backdrops to bring out the vibrant energy of the jewelry.

Stay tuned for more of our colorful and vibrant photoshoots in the future! :)

Capturing Hope and Serenity: Photographing Trasoppklinikken in Oslo, Norway

Recently, I had the opportunity to photograph Trasoppklinikken in Oslo, Norway for their web rebrand. As a photographer, it's always an honor to work on projects that align with my values, and Trasoppklinikken's mission of helping those struggling with addiction is certainly close to my heart.

My goal for the photoshoot was to showcase both the kind and dedicated staff as well as the clinic's premises, with an overall tone of hope and serenity. I wanted to capture the welcoming atmosphere of Trasoppklinikken and convey the sense of safety and support that the clinic provides.

Throughout the shoot, I was struck by the dedication and compassion of the staff. They truly care about their patients and go above and beyond to create a positive and healing environment. It was inspiring to see their work firsthand and capture it through my lens.

As for the premises themselves, Trasoppklinikken is situated in a beautiful location surrounded by nature, with plenty of natural light and calming colors throughout the facility. I aimed to capture the tranquil surroundings and showcase the interior spaces in a way that emphasized the peaceful atmosphere.

Overall, the photoshoot was a wonderful experience, and I'm proud to have been a part of Trasoppklinikken's rebranding process. It's heartening to know that the photos will be used to promote the clinic's mission and help those struggling with addiction find hope and healing.